分析
一般我们使用 Cloudflare Worker 边缘计算用来反向代理是非常合适的,我们可以试着使用 Cloudflare Worker 为即刻 Yellow Page(下文简称 YP) 挂载自定义域名。
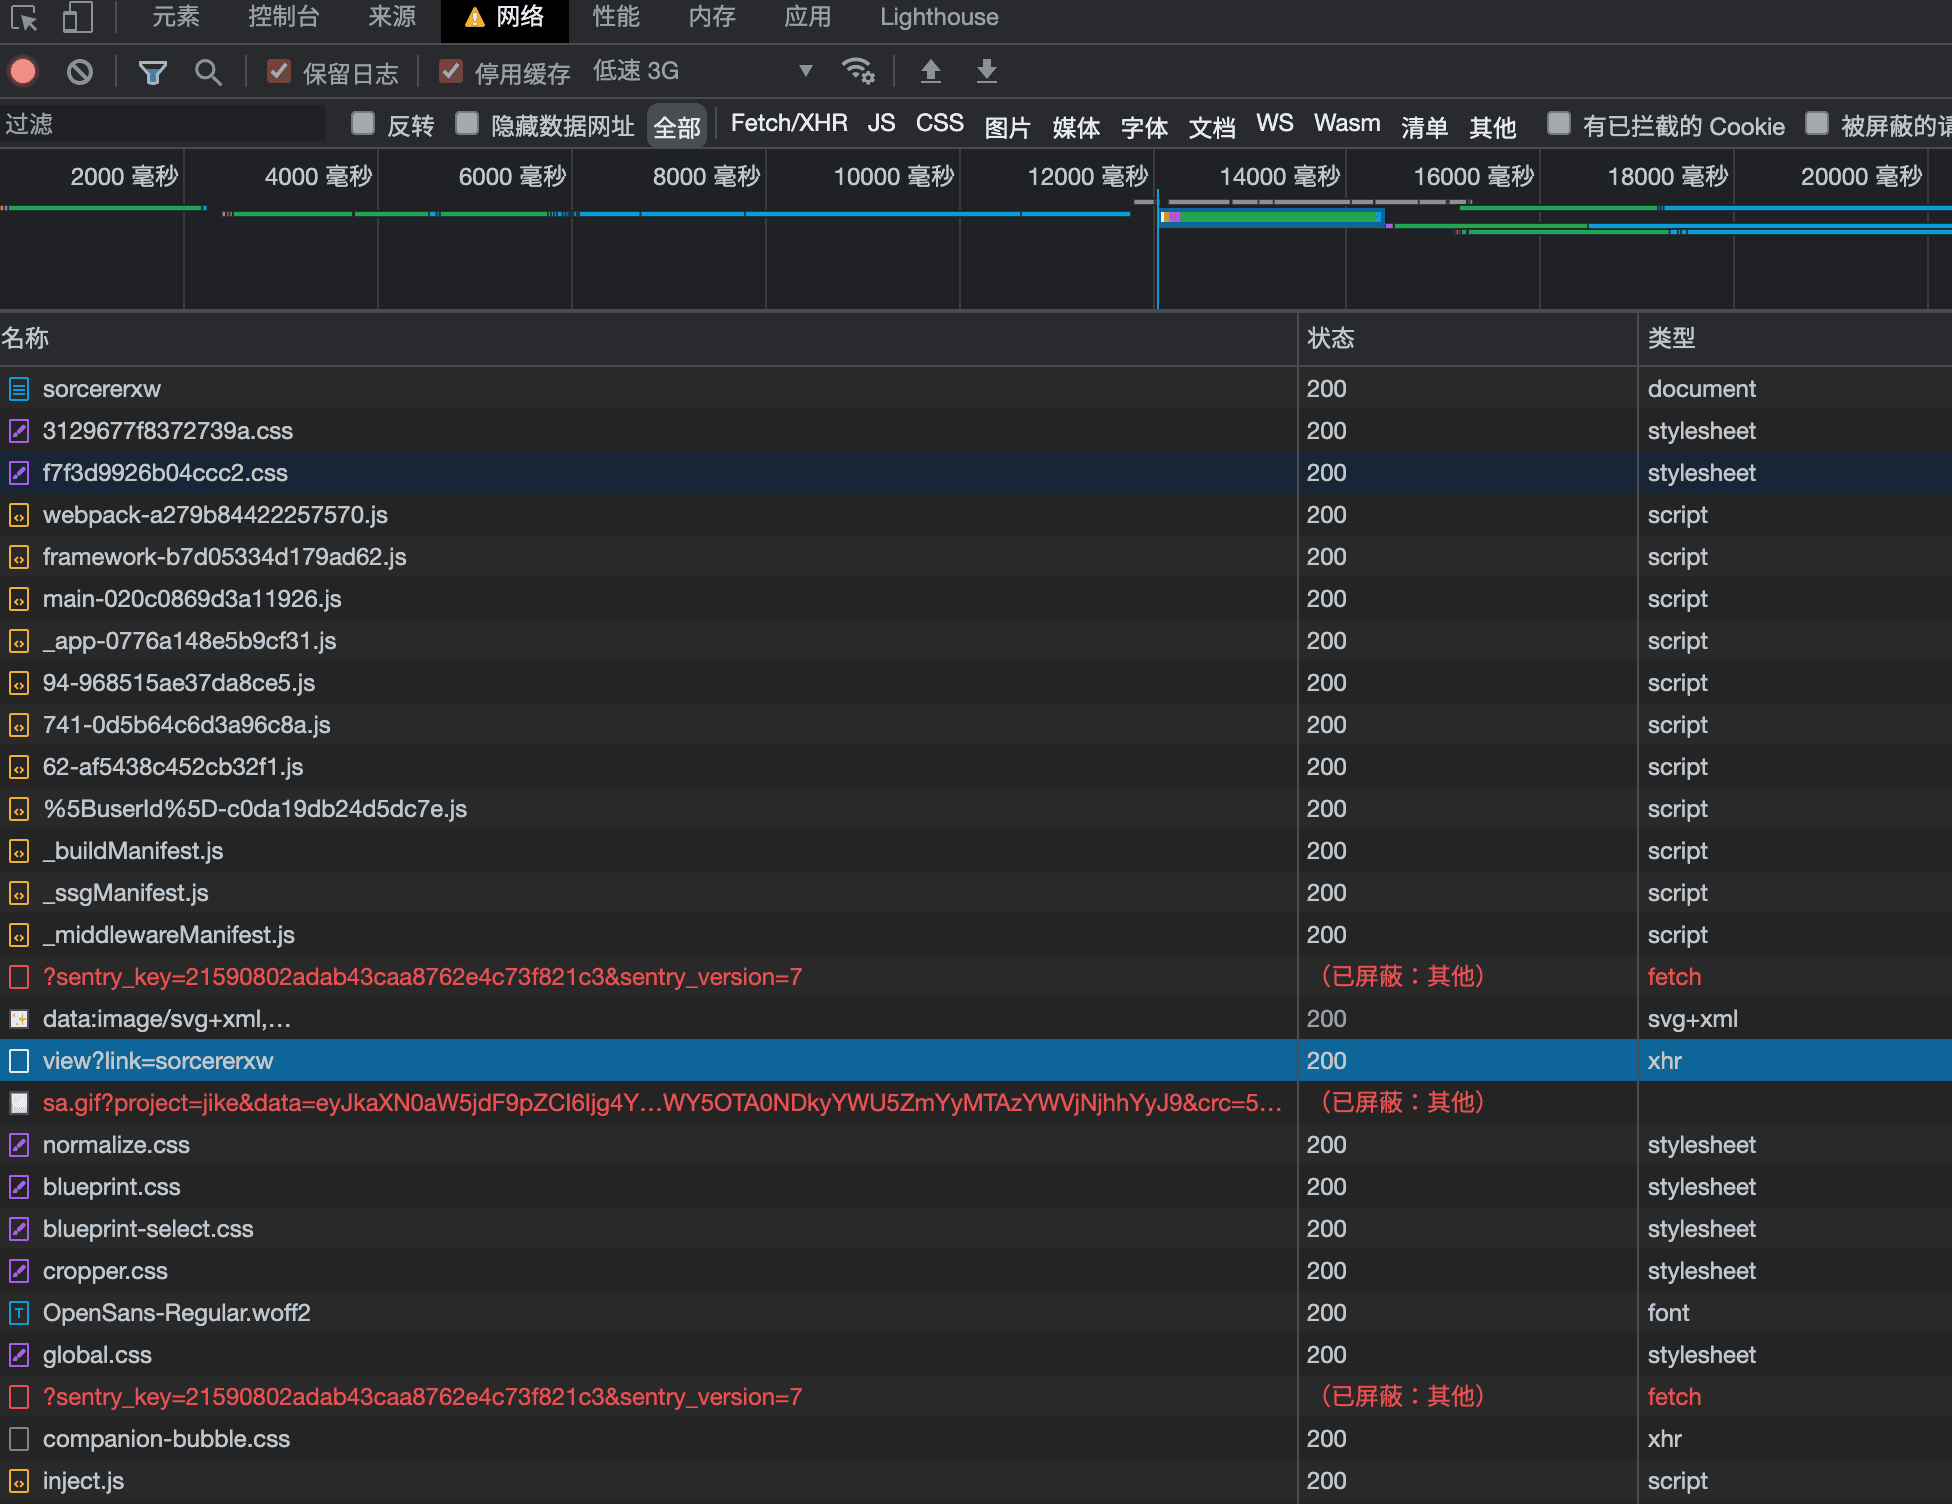
首先分析一下 YP 的网页渲染过程:

- 加载网页 GET jike.city/xxxxx
- 根据 HTML 加载 JS 文件 GET static.codefuture.top/_next/xxxxx.js
- 运行 JS 调用接口,从当前 router 上取出 path,调用接口获取数据 GET api.ruoguoapp.com/xxxx
- 渲染网页
无论是 CDN 还是 api 接口,都会做跨域检查(防盗链),所以所有的网络请求必须通过 worker 本身代理发生。
理解这个过程后,我们可以制定一个简单的劫持方案:
- 使用 worker 获取原始网页。
如果当前网页 path 不是配置的 username,下发 302 要求浏览器跳转到具体 path,便于之后 js 通过 path 提取参数。
- 替换网页内所用 static.codefuture.top,劫持所有静态文件链接到代理自己。
- 代理 js 文件的时候,将 js 文件内的 api.ruguoapp.com 替换为自己,劫持所有 api 请求。
实践
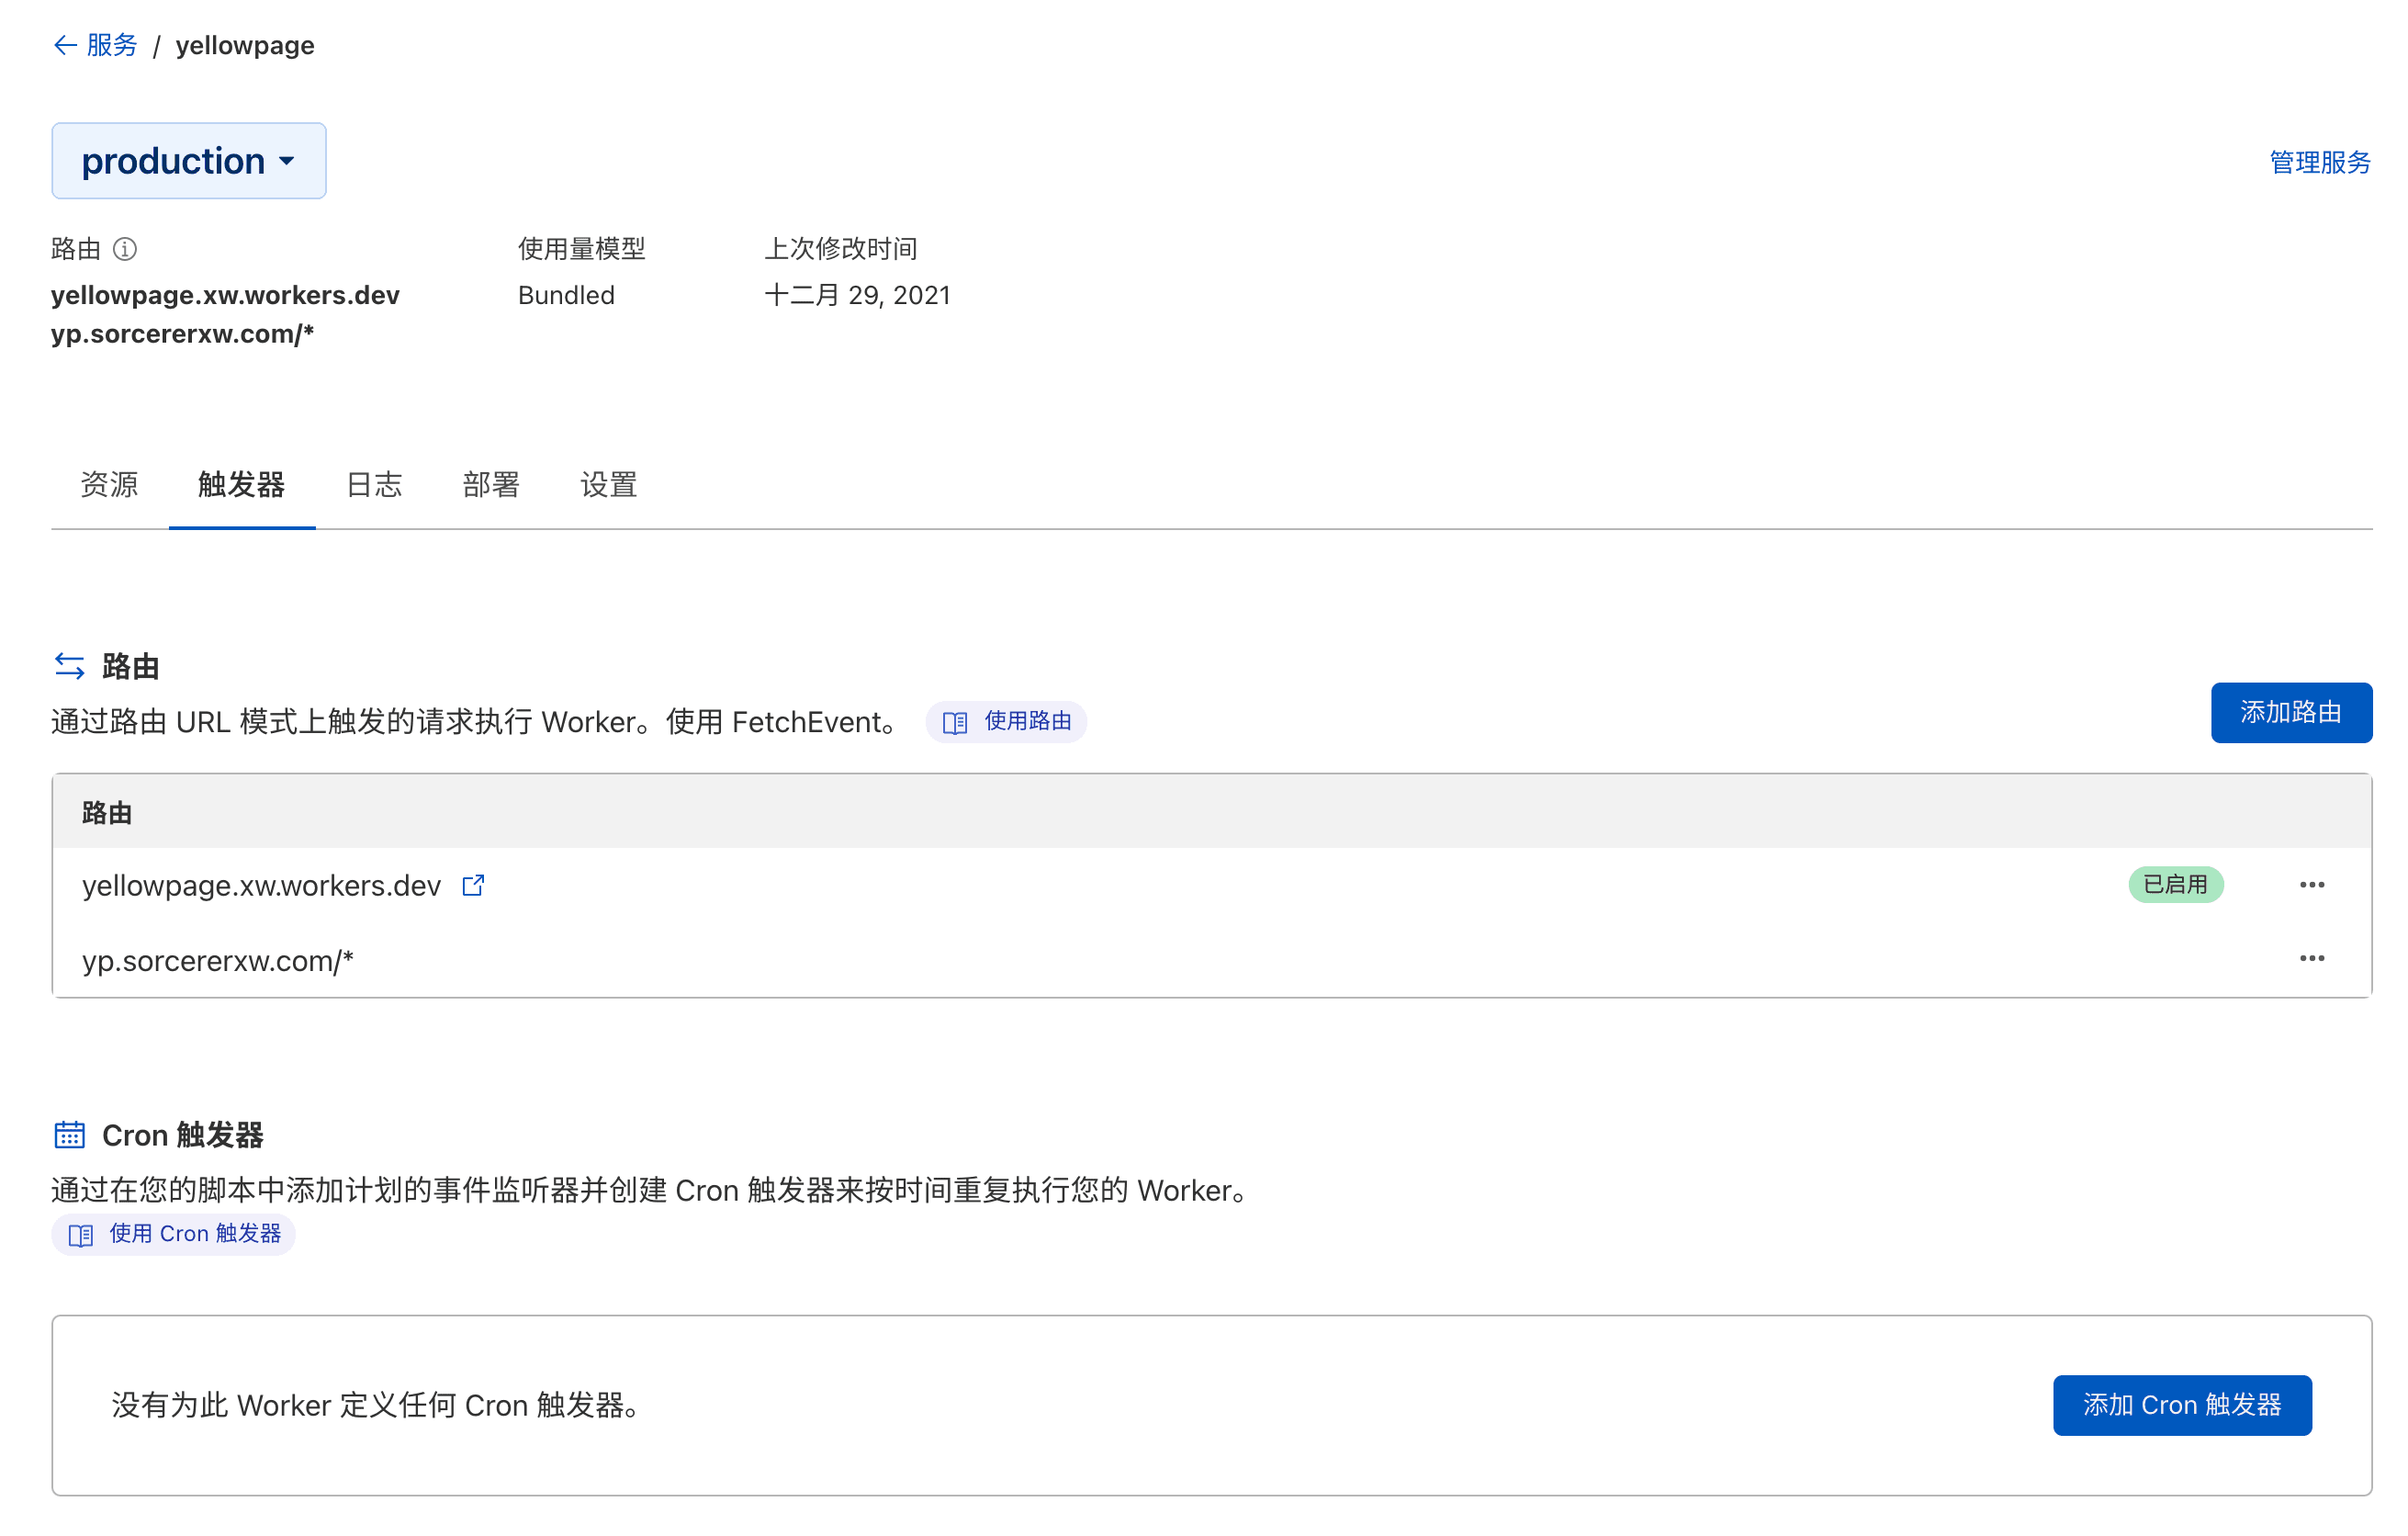
配置域名与 worker


编写脚本

addEventListener('fetch', event => {
    event.respondWith(fetchAndApply(event.request).catch(err=>console.error(err)));
})

// 替换为自己的 username
const username = "sorcererxw"

async function fetchAndApply(request) {
  let url = new URL(request.url)
  const sourceHost = url.host

  // handle static
  if(/^\/static/.test(url.pathname)) {
    url.protocol = 'https:'
    url.host = "static.codefuture.top"
    url.pathname = url.pathname.replace(/\/static/,"")
    const rsp = await fetch(url.href)
    if(/\.js$/.test(url.pathname)) {
      let text = await rsp.text()
      text = text.replaceAll("api.ruguoapp.com", sourceHost+"/api")
      text = text.replaceAll("static.codefuture.top", "/static")
      const header = new Headers(rsp.headers)
      return new Response(text, {
        status: rsp.status,
        headers: header,
      })
    }else {
      return new Response(rsp.body, {
        status: rsp.status,
        headers: rsp.headers,
      })
    }
  }

  // handle api
  if(/^\/api/.test(url.pathname)) {
    url.protocol = 'https:'
    url.pathname = url.pathname.replace(/\api/,"")
    url.host = "api.ruguoapp.com"
    const rsp = await fetch(url.href)
    return new Response(rsp.body, {
        status: rsp.status,
        headers: rsp.headers,
    })
  }

  // handle favicon
  if(url.pathname==="/favicon") {
    return new Response("",{
      status: 404,
    })
  }

  // handle page redirection
  if(url.pathname!=("/"+username)) {
    return new Response("",{
      status: 302,
      headers: {
        Location: "/"+username
      }
    })
  }

  // fetch original html
  const original_response = await fetch('https://jike.city/'+username)

  const new_response_headers = new Headers(original_response.headers)
  new_response_headers.set('access-control-allow-origin', '*')
  new_response_headers.set('access-control-allow-credentials', true)

  let original_text = null

  const content_type = new_response_headers.get('content-type')
  if (content_type.includes('text/html')) {
    const text = await original_response.text()
    original_text = text.replaceAll(`https://static.codefuture.top`, `/static`)
  } else {
    original_text = original_response.body
  }

  return new Response(original_text, {
    status: original_response.status,
    headers: new_response_headers,
  })
}
最后再来试试看咱们的自定义域名 https://yp.sorcererxw.com/ ,享受一下成就感!
总结
以上分析其实就是一个通用的使用 Cloudflare Worker 实现反向代理的流程,同样的流程,我们可以为绝大多数的网站挂上自定义域名。比如大家喜闻乐见的通过 Cloudflare 为 Notion 配置自定义域名的项目 Fruition,仔细分析它的源码之后可以发现它也是对 Notion 整个加载流程做了大量的劫持与注入才实现良好的反向代理效果。

Fruition - Build Your Next Website With Notion, For Free
Perfect for your portfolio, blog, landing page, or business site. Features: pretty links, custom domains, Google Fonts, SEO support, script injection.
https://fruitionsite.com/